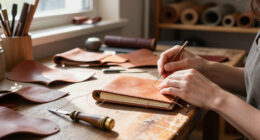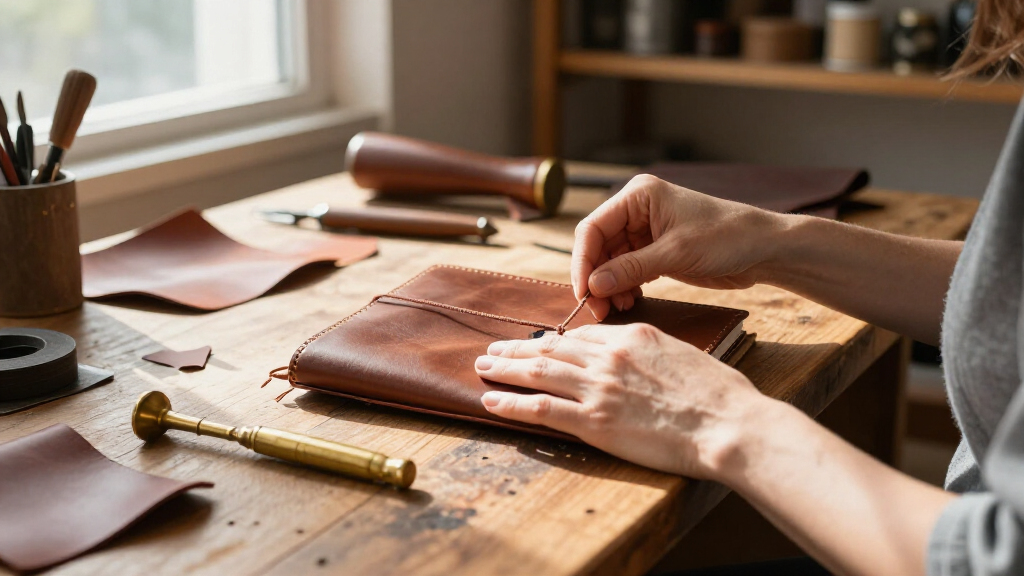
Make a compact, hand-stitched leather journal with a flexible cover and a paper block that opens comfortably. This guide is for beginners who can use a ruler, scissors, and a hand sewing needle. Set aside about 3-5 hours for cutting, punching, and stitching, plus overnight drying time if you use glue.

Get art and craft supplies delivered free — and shop member deals
- Fast, free delivery on millions of items
- Access to Prime Big Deal Days deals on October 6–7
- Prime Video, Amazon Music and more included

RILIHO Leather Journal Notebook – Genuine Leather, 260 Pages, 5×7.1 Inches, Vintage Brown
- ✔ Cover: Genuine leather
- ✔ Binding: Hand-stitched
- ✔ Page count: 260 pages

Leather Village Leather Bound Vintage Journal with Lock Closure, Rustic Brown, 7×5
- ✔ Cover: Cruelty-free genuine buffalo leather
- ✔ Binding: Hand-stitched, lay-flat 180 degrees
- ✔ Size: 7 x 5 inches
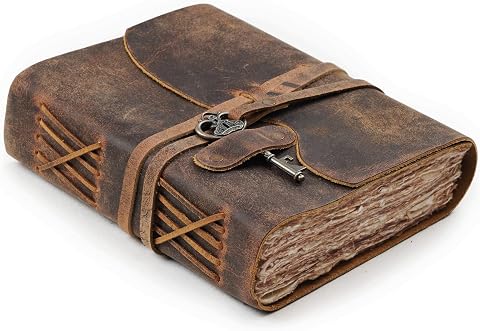
LEATHER VILLAGE Leather Journal with Key Lock, Distressed Brown, 6×4
- ✔ Cover: Cruelty-free water buffalo genuine leather
- ✔ Size: 6 x 4 inches
- ✔ Weight: 100 g
Difficulty: Beginner | Time: 3-5 hours, plus overnight drying time
What You’ll Need
Tools & Materials:
- Vegetable-tanned leather, about 1-2 mm thick
- Paper for 3-5 signatures, 8-12 sheets per signature
- Waxed linen thread or sturdy bookbinding thread
- Bookbinding needle with a blunt or rounded point
- Ruler, pencil, and craft knife or sharp scissors
- Cutting mat or scrap board
- Awl or stitching chisel and a small mallet
- Binder clips or small clamps
- PVA bookbinding glue and a small brush, optional
- Bone folder or the back of a spoon
Knowledge:
- Basic measuring and paper folding
- Safe handling of a craft knife and awl
- Simple hand sewing and tying knots
Choose paper that folds cleanly without cracking; writing paper around 80-100 gsm is a manageable starting point. A journal about 12 x 18 cm when closed is a practical first project. Test your leather and paper with offcuts before cutting the final pieces.
RILIHO Leather Journal Notebook – Genuine Leather, 260 Pages, 5×7.1 Inches, Vintage Brown
For a buyer who wants one leather journal for regular writing, planning and occasional sketching, RILIHO offers the broadest everyday fit in this group. Its 5 x 7.1-inch format gives us more room than the compact LEATHER VILLAGE key-lock journal, while the 260-page capacity exceeds the stated page counts of both alternatives. That makes it a practical choice for keeping one volume in rotation rather than switching notebooks frequently.The hand-stitched genuine leather cover gives it the handmade character central to this roundup, and the gift box and one-year warranty add useful reassurance. Its plain vintage kraft paper keeps the journal open to different uses, from diary entries to planning and sketching. Compared with the cotton rag papers in the Leather Village models, however, the description does not make the same specific case for wet media. Artists choosing paper primarily for watercolor or acrylic should look more closely at those two options.The main compromise is simple: unruled pages require self-guided writing. Readers who depend on lines for neat notes may find the blank layout less comfortable, and kraft paper’s vintage look may not suit someone seeking a crisp, uniform page. We rank it first because it combines useful capacity, a versatile size and traditional leather construction without tying the buyer to an art-focused or highly decorative format.
Pros:
- Hand-stitched genuine leather cover
- 260 pages in a useful 5 x 7.1-inch format
- Plain kraft paper supports varied writing and sketching uses
- Includes gift box packaging and a one-year warranty
Cons:
- Blank pages may be difficult for writers who prefer lines
- Paper is not described with the same wet-media suitability as the cotton papers in the other picks
Best for: Daily journal keepers who want a hand-stitched leather cover, ample pages and a medium-size notebook for writing, planning or casual sketching.
Not ideal for: Writers who need ruled pages or artists who specifically want paper described as suitable for watercolor and other wet media.
Bottom line: We recommend RILIHO as the most adaptable everyday handmade leather journal, provided blank kraft pages fit your writing style.
“We recommend RILIHO as the most adaptable everyday handmade leather journal, provided blank kraft pages fit your writing style.”
Leather Village Leather Bound Vintage Journal with Lock Closure, Rustic Brown, 7×5
When a journal needs to double as a sketchbook, the Leather Village Vintage Journal makes the clearest case for its paper and construction. Its 100% recycled cotton rag paper is described as acid-free and suitable for watercolor, acrylic, pastel and dry media. That gives artists a more specific materials match than RILIHO’s kraft pages, while the 180-degree lay-flat binding makes it easier to draw or write across an open spread without holding the book down.At 7 x 5 inches, it is close in footprint to the RILIHO, so buyers get a familiar portable size rather than the more restricted page area of the 6 x 4-inch key-lock model. The tradeoff is that it has 180 pages, fewer than RILIHO’s 260. Its wrap-around belt and brass lock also give it a more decorative, secure feel than the simpler RILIHO cover, but the closure adds a vintage styling element that may not suit people who want a quick, uncluttered notebook.The rustic buffalo leather and deckle-edge paper emphasize handmade variation. That character is part of the appeal, yet uneven edges and changing leather tones can feel less polished to someone who prefers machine-cut pages and a consistent finish. We place it second because the media-ready paper and lay-flat opening are compelling, but less universally useful than RILIHO’s higher capacity and simpler daily format.
Pros:
- Recycled cotton rag paper is described for wet and dry media
- Lay-flat 180-degree binding supports writing and sketching across spreads
- Buffalo leather cover with hand-stitched construction
- Wrap-around strap and vintage brass lock secure the journal
Cons:
- Deckle-edge pages may feel uneven compared with standard paper
- Natural leather variation means the finish may not be uniform
- Its 180 pages are fewer than RILIHO’s 260
Best for: Writers and artists who want a medium-size handmade journal that opens flat and whose paper is specified for wet and dry media.
Not ideal for: Buyers who want uniform machine-cut pages, a restrained closure, or the largest page count among these options.
Bottom line: We’d choose this Leather Village journal over RILIHO when lay-flat use and media-friendly cotton paper matter more than maximum capacity.
“We’d choose this Leather Village journal over RILIHO when lay-flat use and media-friendly cotton paper matter more than maximum capacity.”
LEATHER VILLAGE Leather Journal with Key Lock, Distressed Brown, 6×4
This 6 x 4-inch key-lock journal is the most portable option in the lineup, with a deliberately old-fashioned look and paper aimed at more than ordinary note taking. Its 200 GSM handmade cotton paper is described as suitable for wet and dry media, offering an art-focused alternative to RILIHO’s kraft pages. The smaller format is easier to tuck into a bag, but it leaves less room for long entries and broad sketches than the 7 x 5-inch Leather Village journal.Its metal key clasp makes the journal feel like a keepsake for private notes, travel observations or small drawings. Compared with the belt-and-brass-lock closure on the larger Leather Village model, the key clasp gives this book a more compact, distinctive presentation. The listed 200 pages provide substantial use for a small notebook, though page count alone does not make up for the reduced writing area when an entry or drawing needs space.Expect a visibly handmade finish: the water buffalo leather is naturally tanned, and both leather texture and paper shading can vary. That makes each journal distinct, but variation from product photos may disappoint buyers who value consistency. It ranks third overall because its portability and thick paper serve a narrower use case than RILIHO’s general-purpose capacity or the larger Leather Village journal’s flat-opening art workspace. For small-format sketching and keepsake writing, though, those priorities may be exactly right.
Pros:
- Compact 6 x 4-inch size is easy to carry
- 200 GSM handmade cotton paper is described for wet and dry media
- Metal key clasp adds a distinctive keepsake-style closure
- Cruelty-free water buffalo leather has a distressed, naturally tanned finish
Cons:
- Smaller pages offer less room than either other journal
- Natural variation can make leather and paper differ from product photos
- Plain pages may not suit writers who want ruled guidance
Best for: Travelers, gift buyers and sketchers who want a compact keepsake journal with a key clasp and thick handmade paper for mixed media.
Not ideal for: People who write long entries, need a larger drawing area, prefer lined pages or want a uniform paper and leather finish.
Bottom line: We’d pick the LEATHER VILLAGE key-lock journal for portable mixed-media notes, as long as its compact pages are large enough for your work.
“We’d pick the LEATHER VILLAGE key-lock journal for portable mixed-media notes, as long as its compact pages are large enough for your work.”
As an Amazon Associate we earn from qualifying purchases.
Before You Start
Work on a stable, well-lit surface. Put a cutting mat beneath the leather and keep fingers out of the knife’s path. Awls and stitching chisels can slip, so clamp the material and punch away from your supporting hand. Measure the paper block before cutting the cover; leather dimensions depend on the finished page size and spine thickness.
This method uses a simple pamphlet-style binding: each folded paper signature is sewn through the fold and attached to the cover at the spine. Avoid soaking the leather. If you use glue, apply a thin layer only where specified and let it dry fully before flexing the journal.
Step-by-Step Instructions
Step 1: Choose the finished journal size
Pick a closed size, such as 12 x 18 cm. Decide how many pages you want, then divide the paper into equal groups of 8-12 sheets. Each group is one signature. For a 12 x 18 cm journal, cut sheets approximately 24 x 18 cm so they fold to the intended page size. Stack and fold each group in half, keeping the edges aligned. Press each fold with a bone folder or spoon.
Tip:Thick signatures are harder to fold and sew. Use fewer sheets per group if your paper is heavy.
Check: All signatures have the same height and width, and each fold forms a straight crease.
Step 2: Measure and cut the leather cover
Stack the folded signatures and measure the thickness of the stack at the spine. Cut one leather rectangle whose height matches the pages plus about 5 mm at the top and bottom. Make its width equal to twice the page width, plus the spine thickness, plus about 3 mm of ease. For example, a 12 x 18 cm page block with a 1 cm spine needs a cover about 25.3 x 18.5 cm. Mark the measurements on the leather’s back and cut slowly with a ruler as a guide.
Tip:Use several light knife passes instead of forcing one deep cut. Check the blade is sharp and the ruler cannot slide.
Check: The cover is flat, with clean edges, and the folded paper block fits inside with a little clearance at the top and bottom.
Step 3: Mark the sewing stations
Place one signature inside the leather cover, aligned with the spine. Mark three to five evenly spaced sewing points along the center of its fold, including one near each end. Transfer the same spacing to every signature. Open each signature and mark the holes on the inside of the fold. Clamp the folded paper between scrap boards, then pierce each mark with an awl. Make matching holes through the leather spine, keeping them in a straight line.
Tip:Make a paper template for the station spacing and reuse it. Keep the holes far enough from the paper edges that the thread will not tear through.
Check: The holes line up from signature to signature and pass through the leather spine at matching positions.
Step 4: Prepare the thread and needle
Cut a length of waxed thread about four times the height of the journal for each signature. Thread the needle and pull the thread through until both ends are even. Do not knot the thread at the needle. If the thread frays, trim the end at an angle or roll it between your fingers to narrow it.
Tip:Shorter thread is easier to control. If you run out while sewing, join a new length inside the signature with a small secure knot.
Check: The thread passes through the needle’s eye without splitting, and there is enough length to sew the full signature with working tails.
Step 5: Sew each signature to the cover
Open the first signature and start at one end station, sewing from inside the fold through the paper and leather spine to the outside. Return through the next station into the fold, then continue in and out through each hole until you reach the other end. Pull the thread snug after each pass, but do not crush the fold or cut into the paper. Tie the two thread ends together inside the signature with a secure square knot. Repeat for every signature, keeping each one aligned in the cover.
Tip:Keep the thread path consistent and avoid crossing over a hole. If using the same holes for multiple signatures, pass the needle beside existing thread rather than splitting it.
Check: Each signature is attached firmly, sits centered on the spine, and can open without the thread cutting through its fold.
Step 6: Set the spine and optional glue
Close the journal and align the page edges by tapping the book block gently on the table. Hold it with binder clips near the spine, protecting the leather with scrap paper. If desired, brush a thin coat of PVA bookbinding glue over the exposed thread and spine area inside the cover. Keep glue off the page edges and the leather’s outer surface. Leave the journal clamped until the glue dries according to its label; for a thin layer, allowing it to rest overnight is a safe working interval.
Tip:Glue adds stability but is optional. Too much glue can make the spine stiff and cause pages to stick together.
Check: The spine remains aligned when the clips are removed, and no pages are glued shut.
Step 7: Finish and inspect the journal
Remove the clips after any glue has dried. Open the journal a few pages at a time, then check the center folds and knots. Trim loose thread tails close to the knots without nicking the paper. If needed, smooth rough leather edges with fine sandpaper, using light strokes. Close the journal and let the cover settle flat under a light book for an hour.
Tip:Do not force the journal fully flat on its first opening. A sewn book usually loosens with gentle use.
Check: The cover closes around the pages, the signatures stay attached, and the pages turn without catching or pulling free.
Common Mistakes to Avoid
- Cutting the cover before measuring the assembled paper block. — Fold and stack all signatures first, measure the actual spine thickness, then calculate the cover width.
- Pulling the sewing thread too tightly. — Tighten each stitch only until it lies flat. Excess tension can tear paper or pucker the leather.
- Punching holes too close to a fold edge. — Keep the sewing line centered on the fold and leave enough paper between each hole and the edge to resist tearing.
- Applying a thick coat of glue to the spine. — Brush on a thin layer, keep it away from page edges, and allow it to dry before opening the journal.
Troubleshooting
Problem: The pages do not fit inside the cover.
Solution: Check that the cover dimensions include both page panels and the measured spine thickness. If the cover is slightly too narrow, resew with a thinner page block or cut a larger cover before binding.
Problem: A sewing hole tears through the paper.
Solution: Stop pulling, move the station inward on the next signature, and use lighter tension. If the tear is small, reinforce the fold with a narrow strip of archival paper before sewing.
Problem: The signatures sit crooked or shift while sewing.
Solution: Loosen the thread, realign the signature against the spine, and clamp the stack before continuing. Check the hole positions against the first signature.
Problem: The journal spine feels stiff after gluing.
Solution: Let the glue dry completely, then open the journal gradually at several page spreads. If glue has reached page edges, separate the pages carefully with a thin sheet of paper.
What Success Looks Like
The finished journal has a leather cover that folds around the page block, evenly aligned signatures attached along the spine, and pages that turn without tearing or sticking. Open it gently to several spreads: the binding should hold, the paper should remain secure, and the cover should close without excessive strain.
Next Steps
Use a soft dry cloth to remove dust and store the journal away from damp areas and direct heat. Write on a spare page first if using ink that may bleed through. For a second journal, adjust the page size, add a simple leather tie, or change the number of signatures after measuring the new spine thickness.
Frequently Asked Questions
Can I make the journal without a stitching chisel?
Yes. Mark the stations with a ruler and pierce them with an awl. Make each hole perpendicular to the surface and keep the spacing consistent. A chisel speeds up repeated holes but is not required.
Can I use thick cardstock for the pages?
Use light cardstock sparingly. Thick sheets make signatures bulky and difficult to fold, sew, and open. For a first journal, use writing paper around 80-100 gsm.
How many signatures should I include?
Three to five signatures make a manageable first journal. Add more only after checking that the leather cover is wide enough for the thicker spine.
Do I need to condition the leather?
Not for this project. If the leather feels dry, test a small amount of leather conditioner on an offcut and let it dry before treating the cover, since some products darken leather.
Fall Picks
fall essentials
As an affiliate, we earn on qualifying purchases.